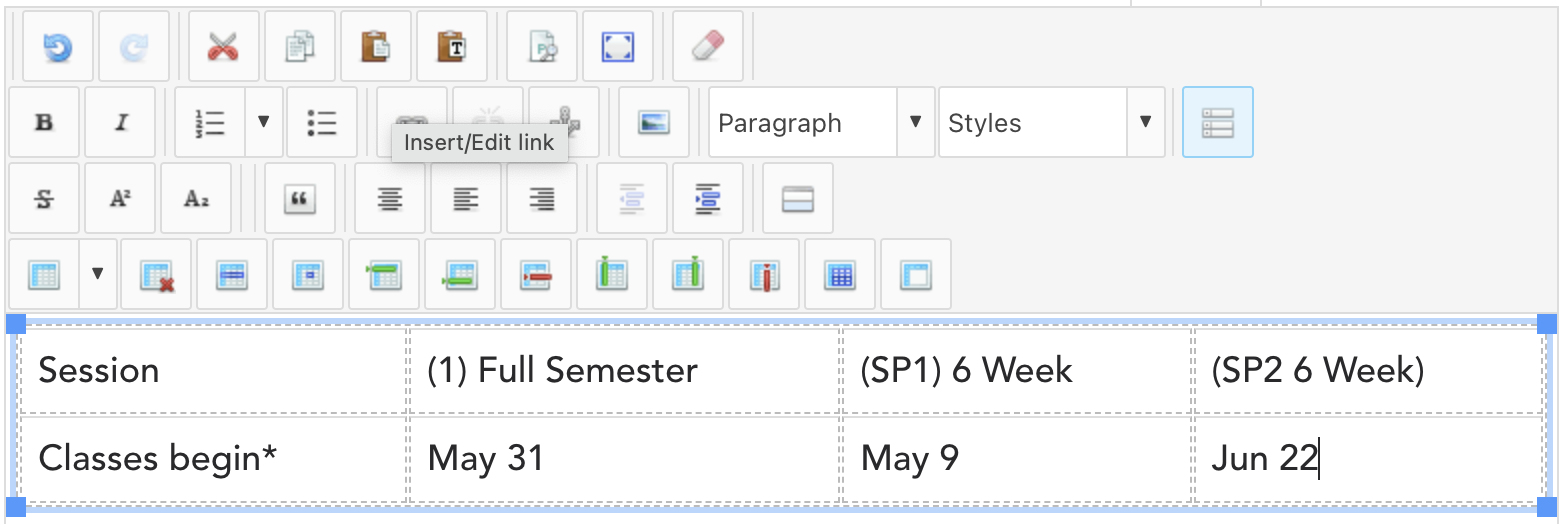
For this training example, a table will be created using the first 4 columns and first 2 rows of the 2022 Summer Calendar.
Instructions for inserting a table
In the editor, insert the cursor where you would like to add a table. Click the dropdown arrow in the ![]() Insert a table button and select the amount of columns/rows you need:
Insert a table button and select the amount of columns/rows you need:

Insert your text appropriately:
With your cursor still inside of the table, click the ![]() Insert a table button again but this time click directly on the table image/icon, not the dropdown arrow.
Insert a table button again but this time click directly on the table image/icon, not the dropdown arrow.
Go to the Advanced tab and place your cursor in the "Classes" text input field. Type the secondary class you would like to apply to this table. (The class "table" needs to stay.) There should be a space in between "table" and your secondary class. For this example we are using "table-striped."
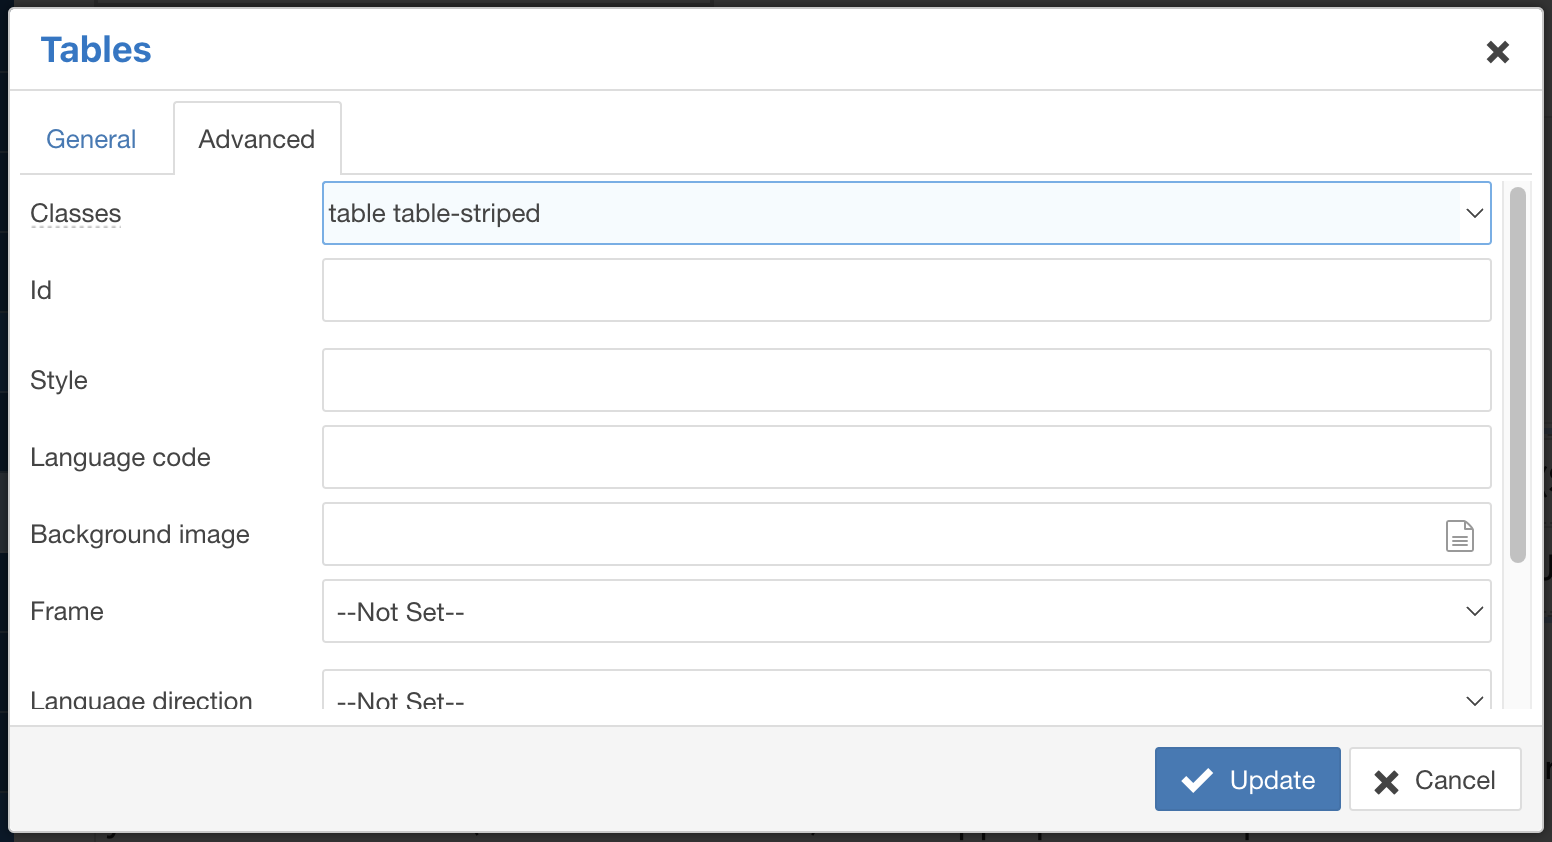
Note: For all class (styling) options, please refer to the section on Tables in the OMC Web Style Guide.
Click the ![]() Update button.
Update button.
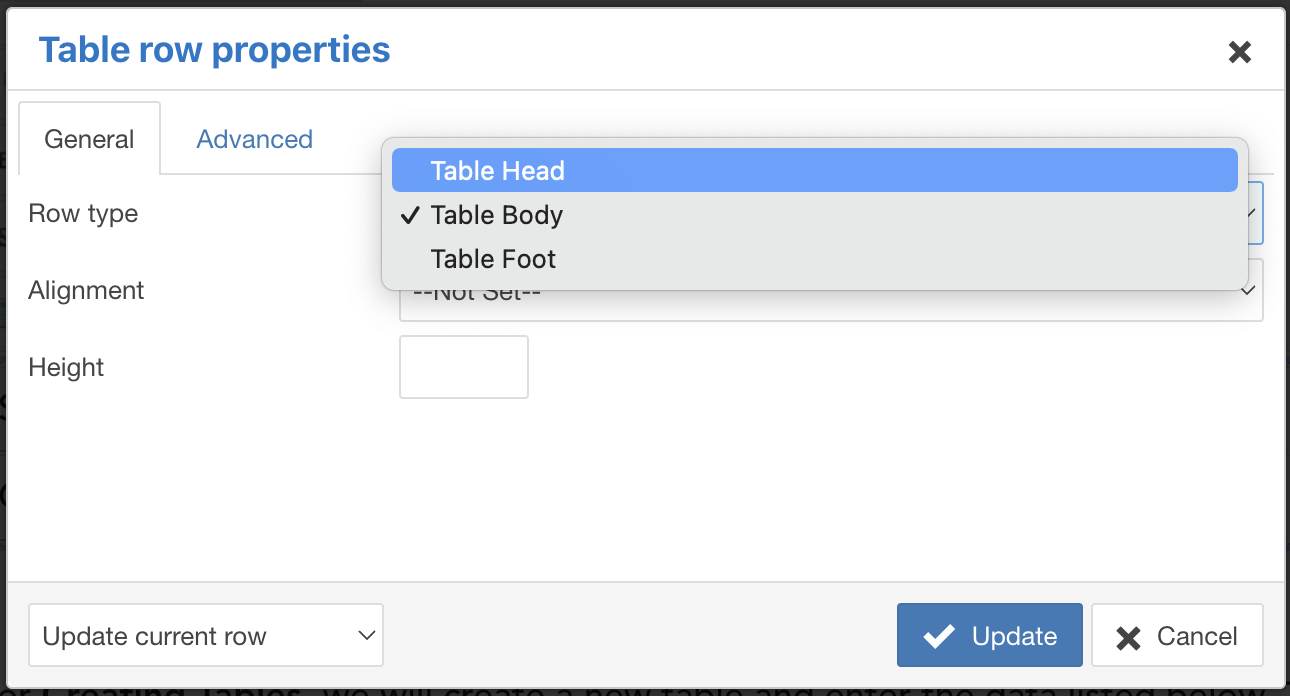
Next, you need to designate the row in your table that is the heading row.
With your cursor placed in your heading (top) row, select the ![]() Table row properties button. Select "Table Head" from the Row Type dropdown menu.
Table row properties button. Select "Table Head" from the Row Type dropdown menu.
Click the ![]() Update button.
Update button.
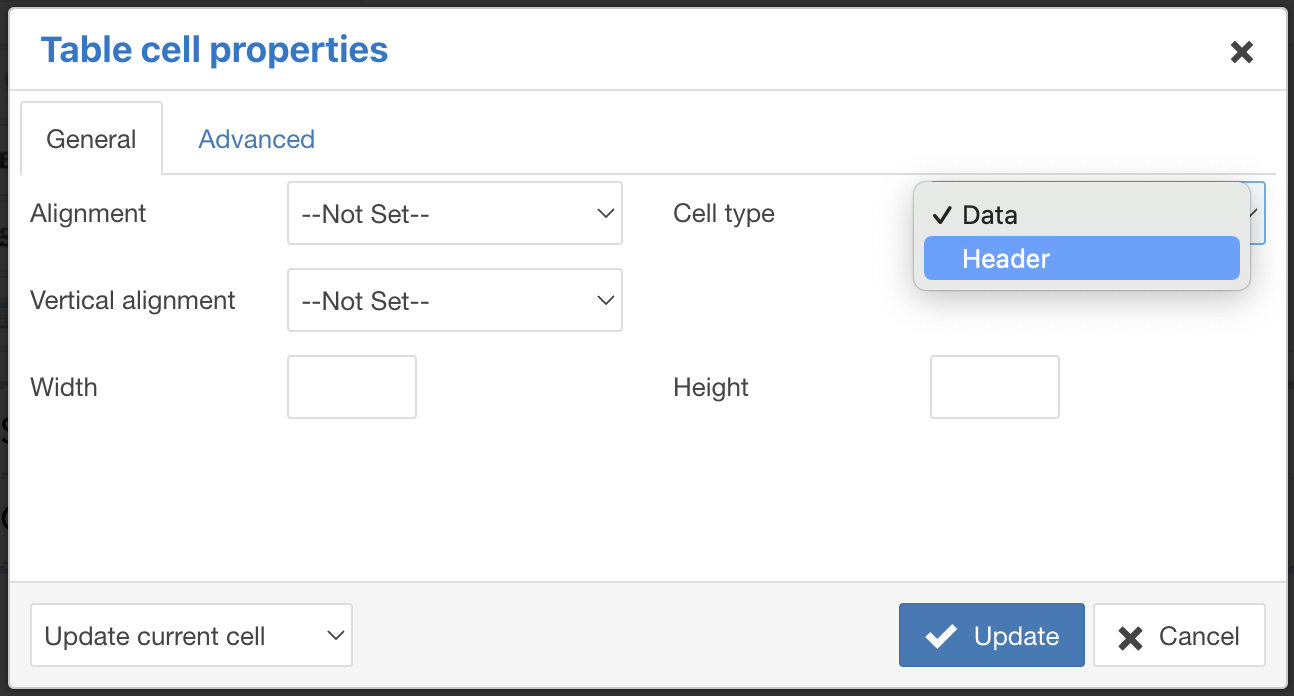
Next, you need to designate each cell inside of your table heading row as a header cell. With your cursor placed inside the first cell of your heading row, click the ![]() Table cell properties button. Designate the cell type as a Header using the Cell type dropdown:
Table cell properties button. Designate the cell type as a Header using the Cell type dropdown:
Click the ![]() Update button. When prompted with a "Are you sure?" question, click yes.
Update button. When prompted with a "Are you sure?" question, click yes.
Repeat the steps for designating each cell in the table heading row as a header cell type.
Remember to click the ![]() Save & Close button when you're done building your table.
Save & Close button when you're done building your table.