The following instructions illustrate and explain how to upload required immunization forms to UAH's secure Charger Health Portal via a computer or a mobile phone. The process for most immunization documents is the same. For specific instructions about how to comply with UAH's tuberculosis screening requirements, click here. If you have any questions, please contact the Student Health Center at immunizations@uah.edu or call us at 256.824.6948.
On a Computer
Step 1
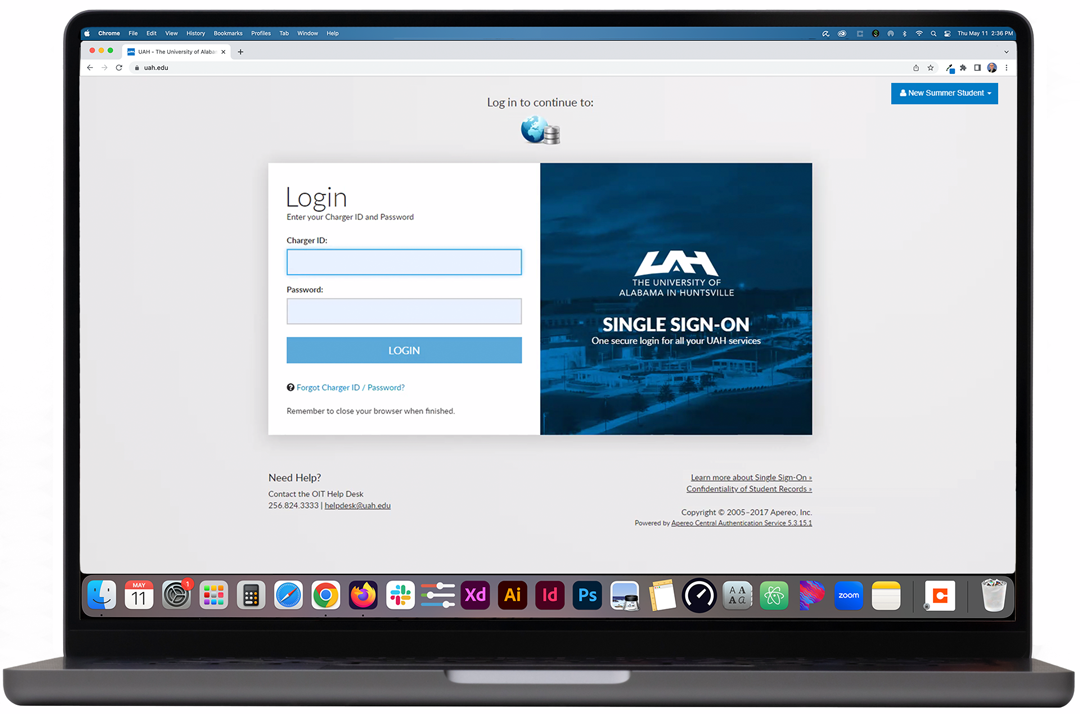
Log in to the Charger Health Portal.
Step 2
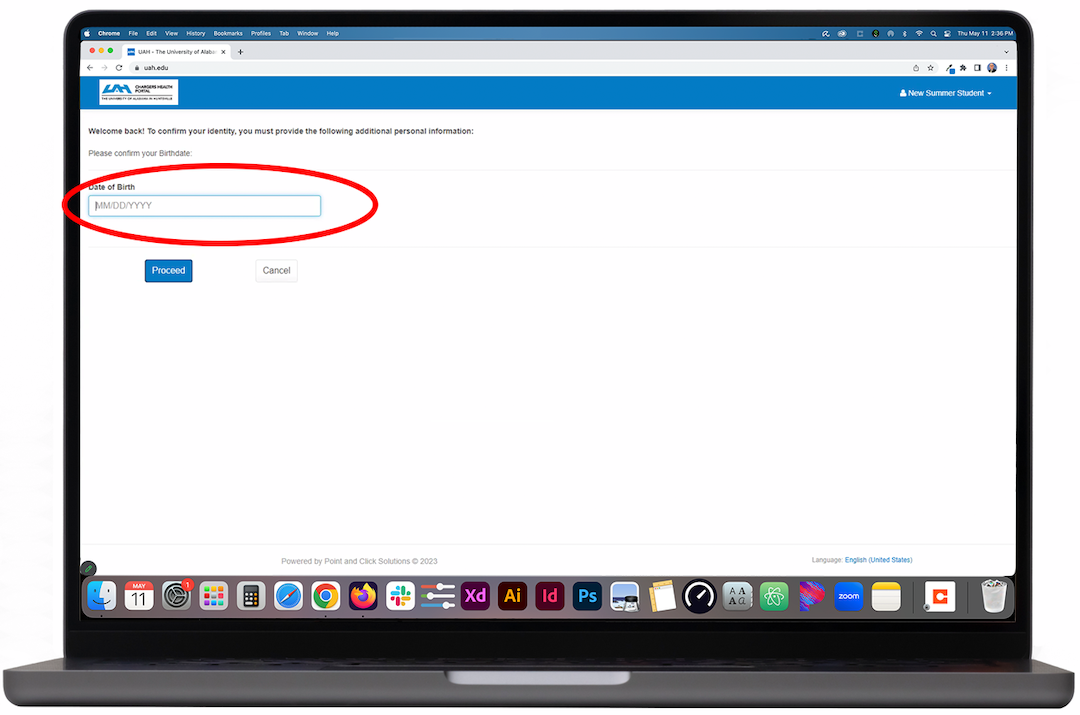
Confirm your identity by answering the prompt.
Step 3
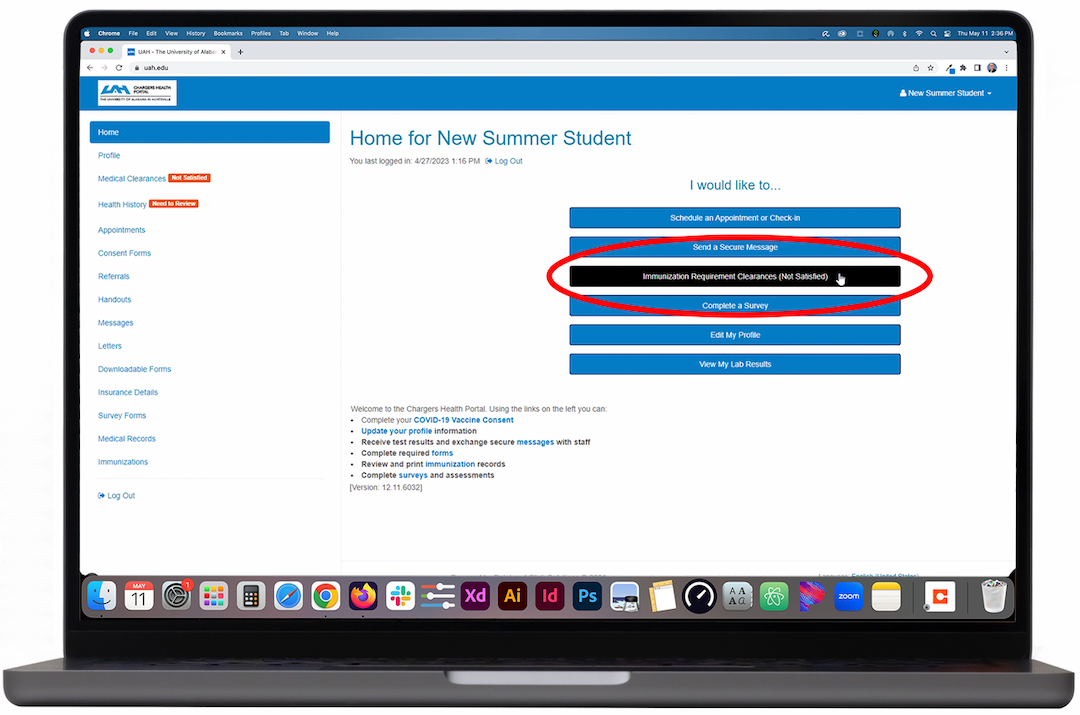
Click the Immunization Requirement Clearances button.
Step 4
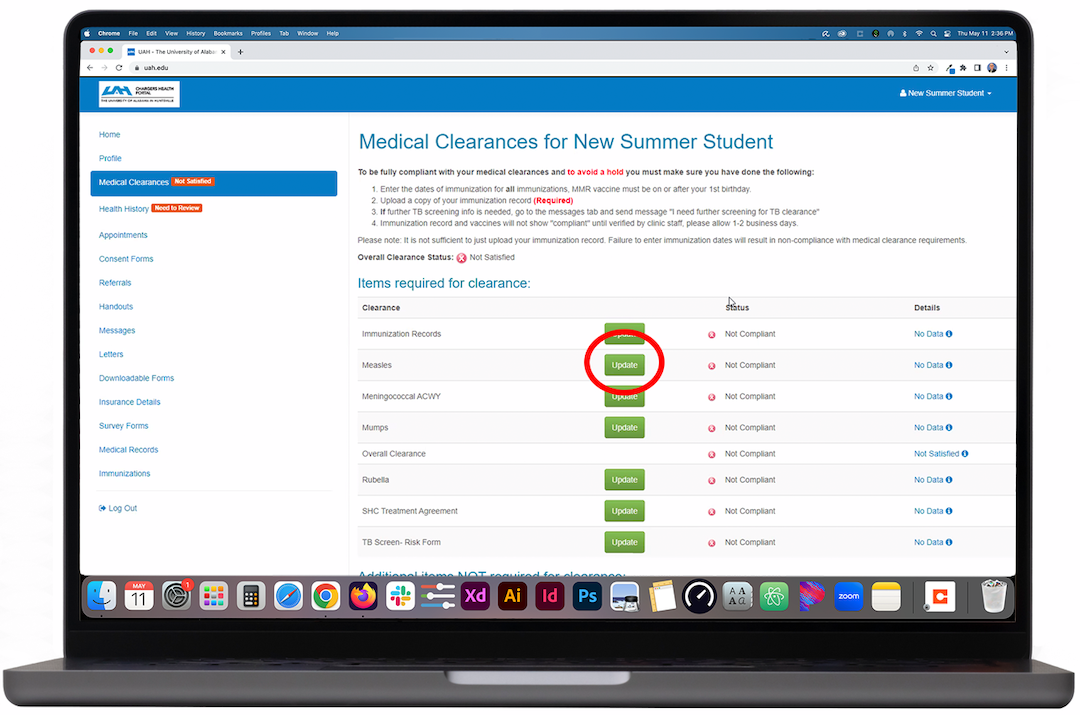
On the Medical Clearances for New Student page, select the clearance item you wish to update and click the green Update button.
Step 5
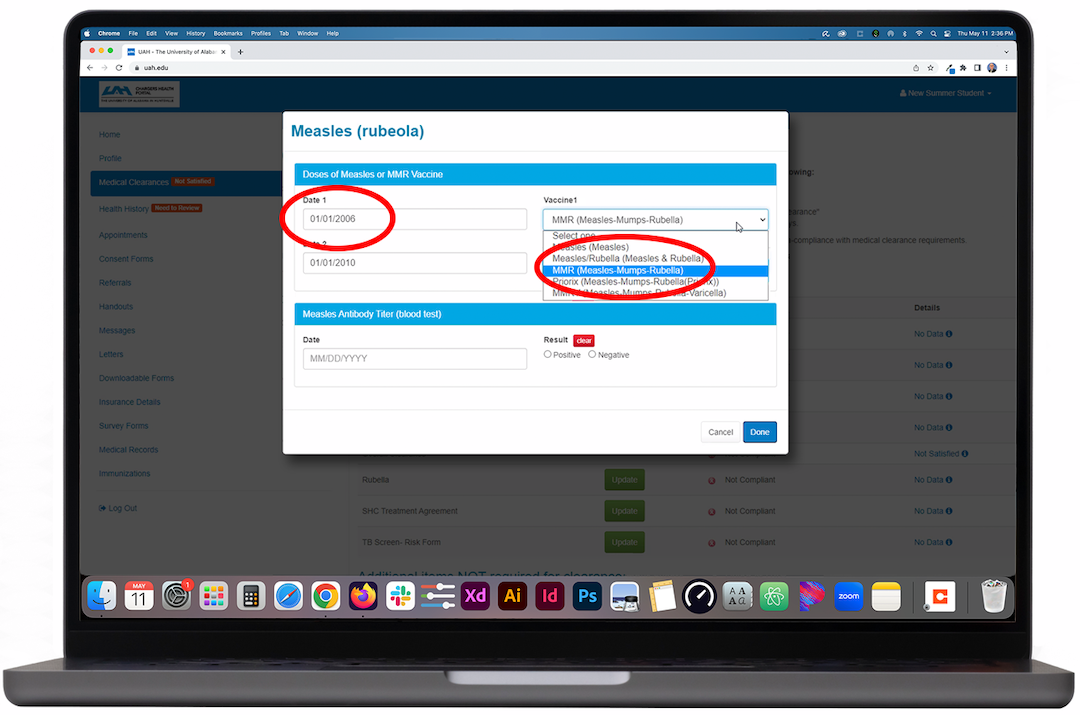
A pop-up window will appear. Depending on the requirements of the record, type the Date you received the vaccine and select the name of the vaccine from the dropdown Vaccine menu.
Step 6
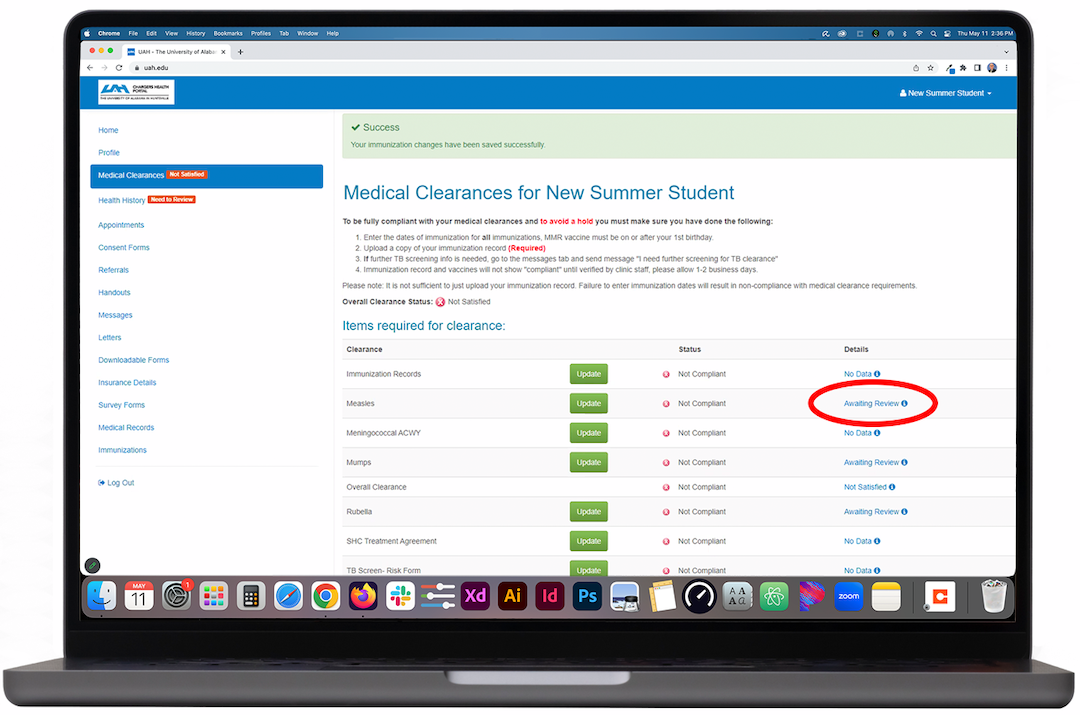
You will return to the Medical Clearances menu. A green Success banner will appear at the top of the screen, indicating that you completed the step successfully. You should see a note saying Awaiting Review in the Details column of the clearance item you previously selected.
Step 7
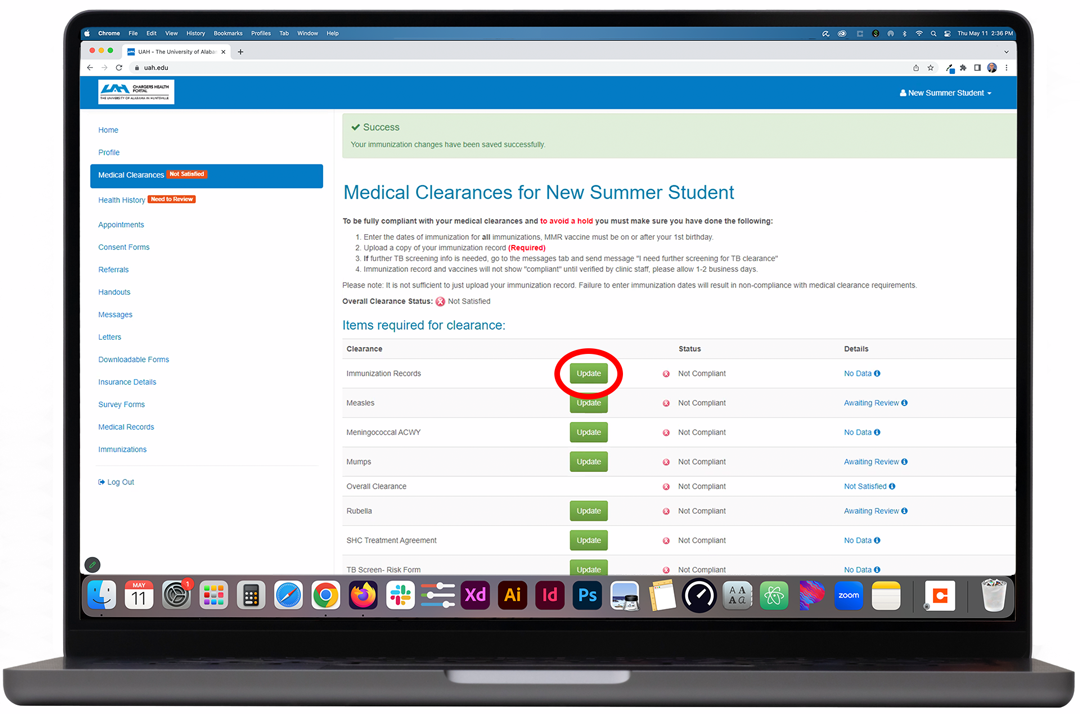
Next, you must upload a proof of immunization document for that vaccine from your health care provider. To do this, click the green Update button next to the Immunization Records clearance item.
Step 8
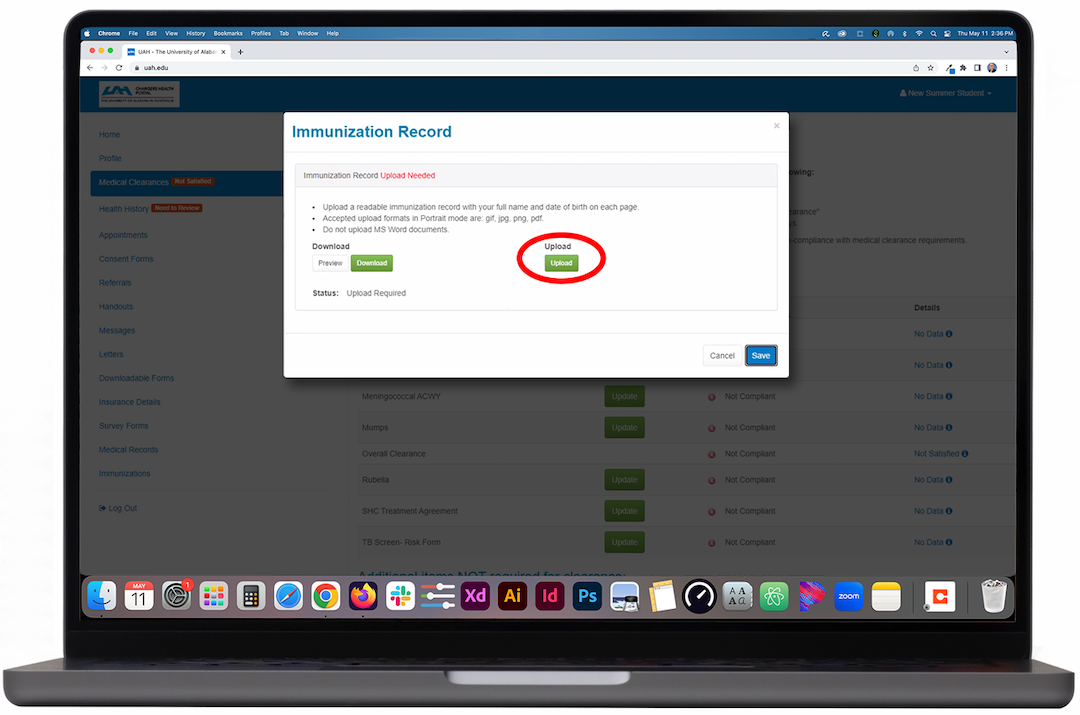
A pop-up window titled Immunization Record will appear. Click the green Upload button. When the file selection window appears, select the appropriate proof of immunization file that you received from your health care provider.
Step 9
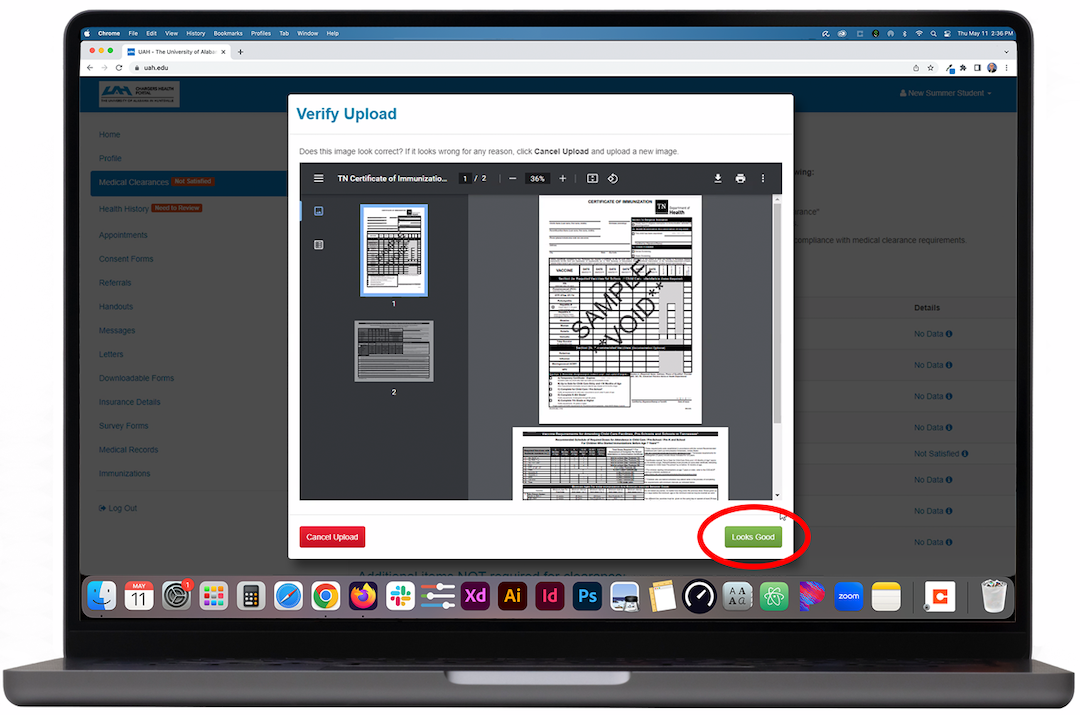
A second pop-up window titled Verify Upload will appear. Review the preview of the immunization form you just selected. If it is the correct form, click the green Looks Good button.
Step 10

The Immunization Record pop-up window will reappear. Click the blue Save button.
Step 11
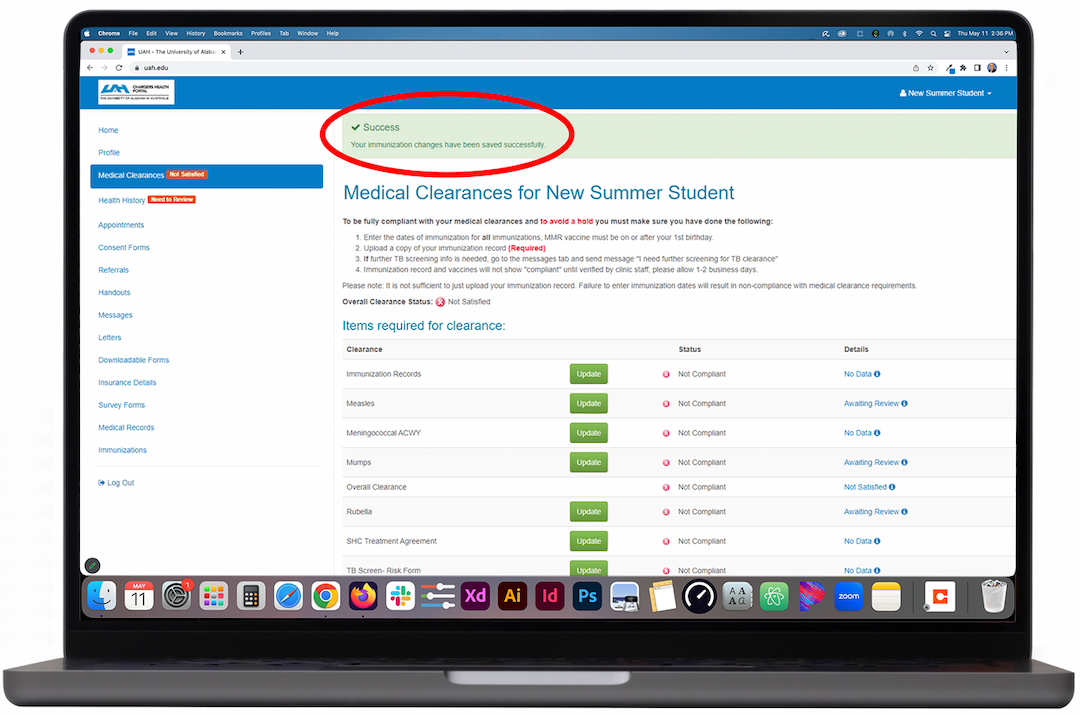
If the form was successfully submitted, you will be sent back to the Medical Clearances for New Student menu. A green Success! banner will appear at the top of the window.
Note: Repeat steps 4 through 11 for each required clearance item. Then, proceed to step 12 below.
Step 12
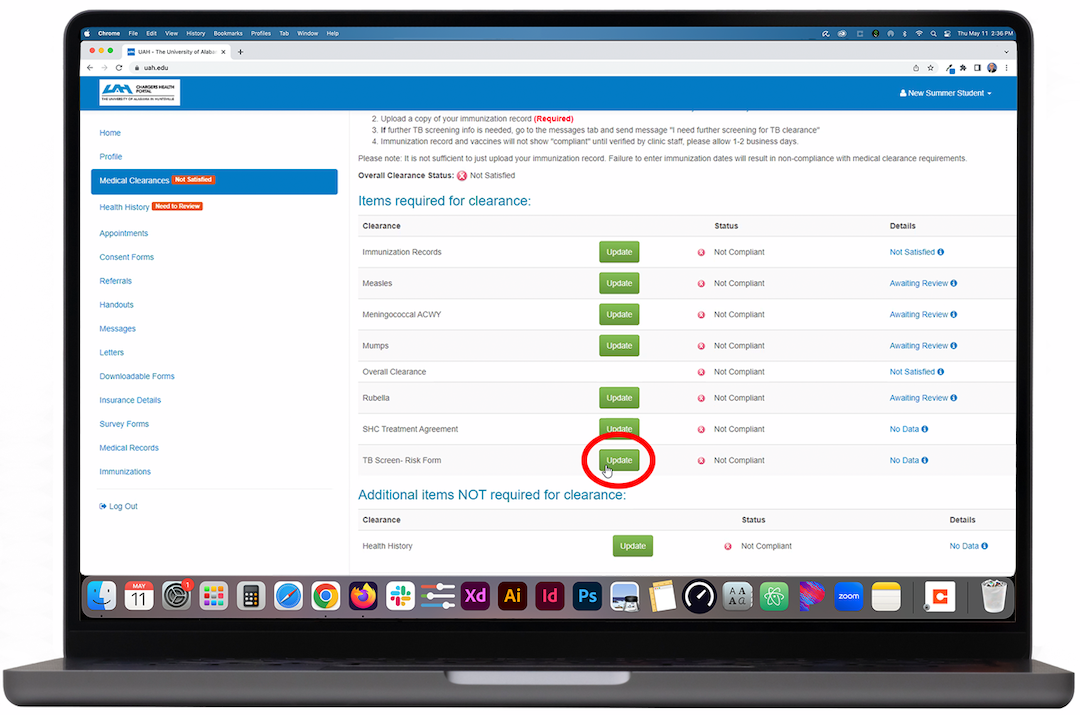
After uploading all your immunization forms, you must then complete a tuberculosis risk screening. On the Medical Clearances for New Student page, scroll down and click the green Update button for the TB Screen - Risk Form menu item.
Step 13
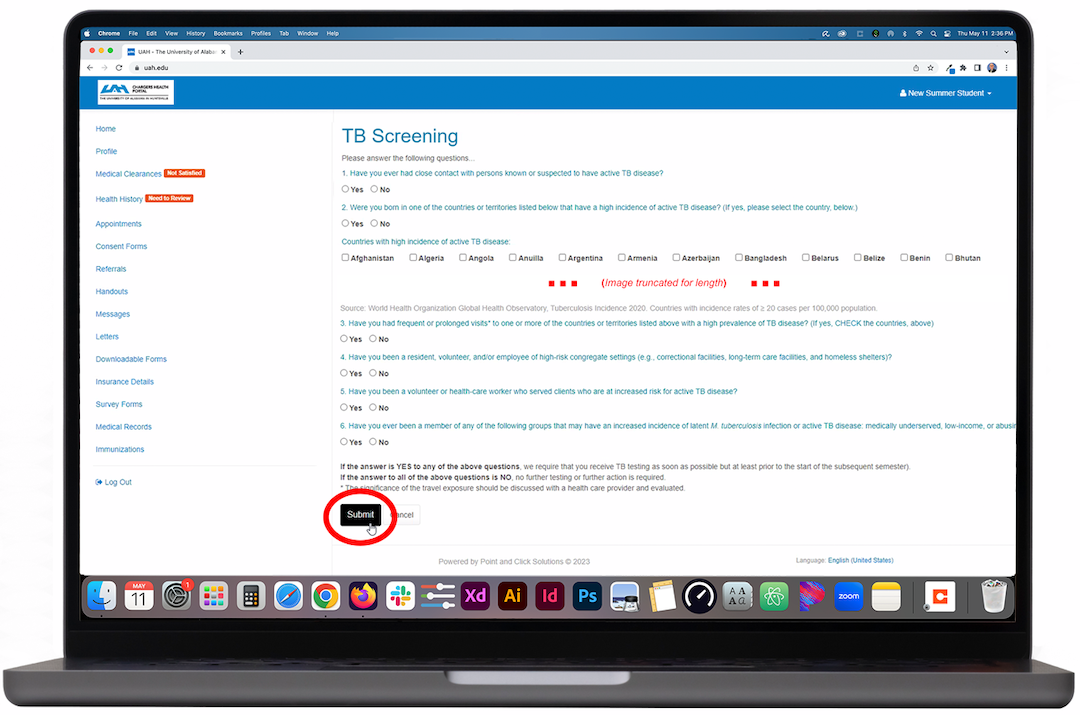
The TB Screening page will load. Please answer all six questions truthfully and click Submit when you are finished.
Step 14
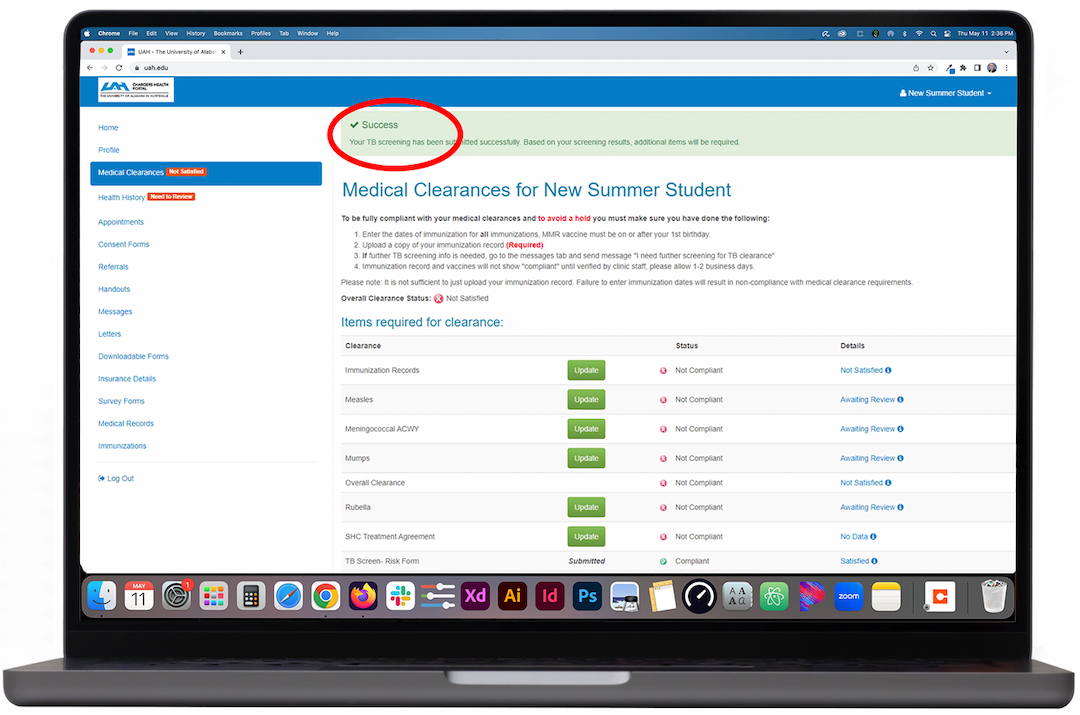
You will be sent back to the Medical Clearances for New Student menu. A green Success banner will appear at the top of the window, indicating that your form was successfully submitted.
Step 15
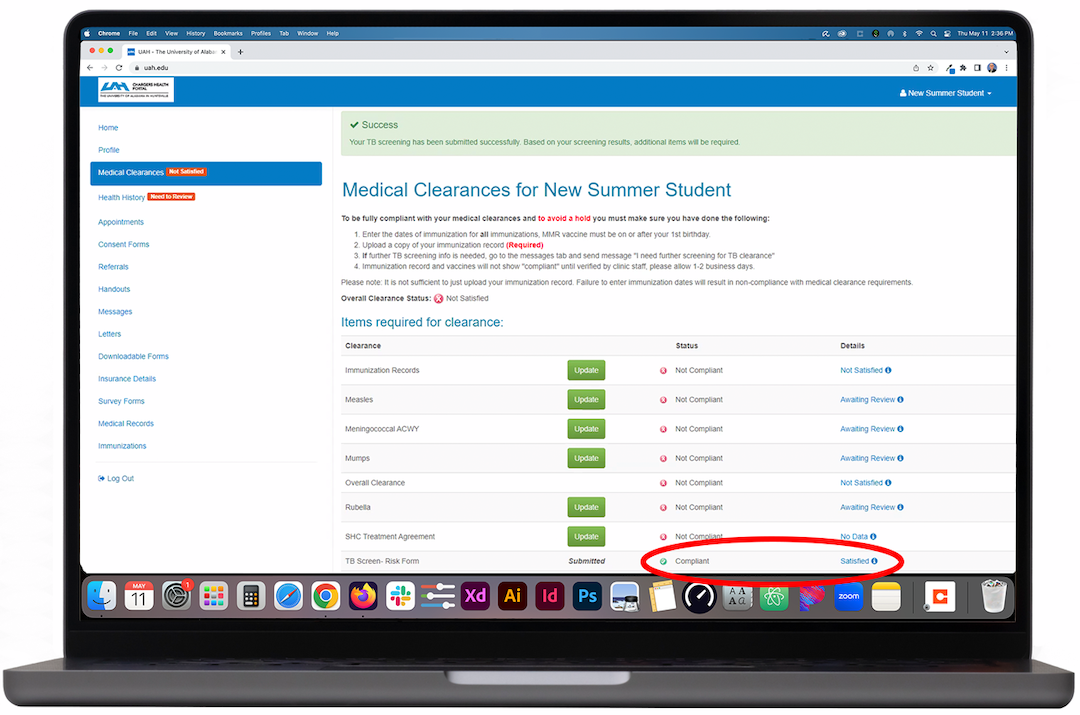
If your responses were satisfactory, you will see Compliant and Satisfied in the Status column of the TB Screen - Risk Form row. You do not need to do anything else unless notified by clinic staff. If you receive notification that further action is required, proceed to Step 8 of the Tuberculosis Screening process.
A Final Note:

When finished, each clearance menu item you complete will still say Not Compliant in the clearance item's Status column. Do not worry. You should see a note saying Awaiting Review next to the Not Compliant status column. As soon as a clinic staff member reviews and confirms your uploaded form, they will change your status to Compliant. You do not need to do anything else unless notified by clinic staff.
On a Mobile Device
Step 1
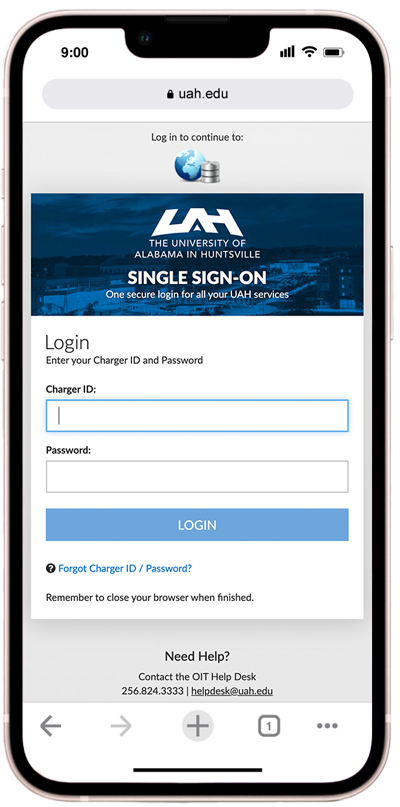
Log in to the Charger Health Portal.
Step 2
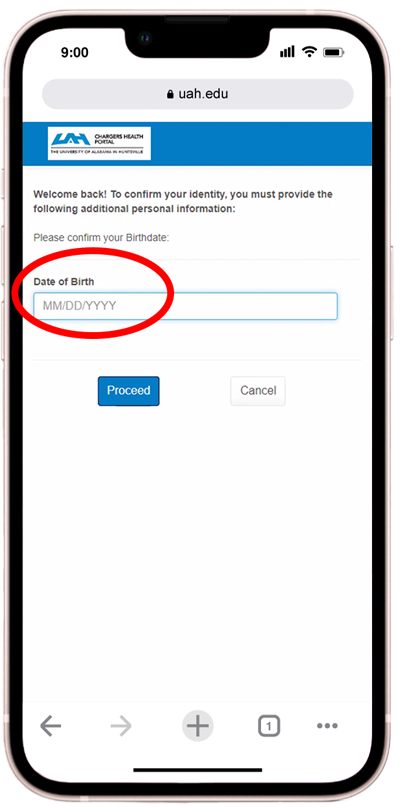
Confirm your identity by answering the prompt.
Step 3
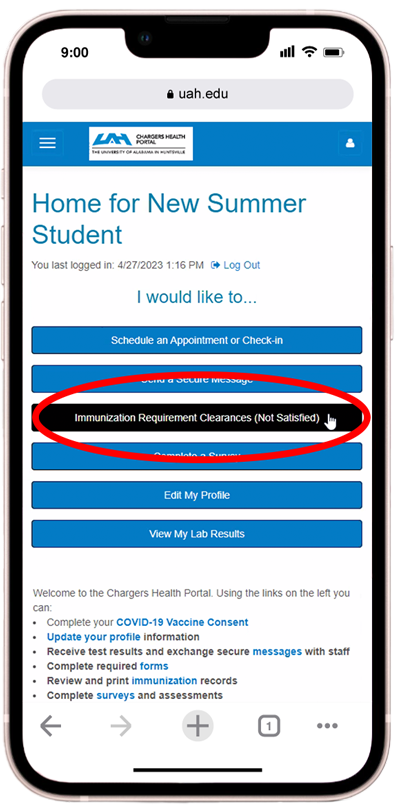
Click the Immunization Requirement Clearances button.
Step 4
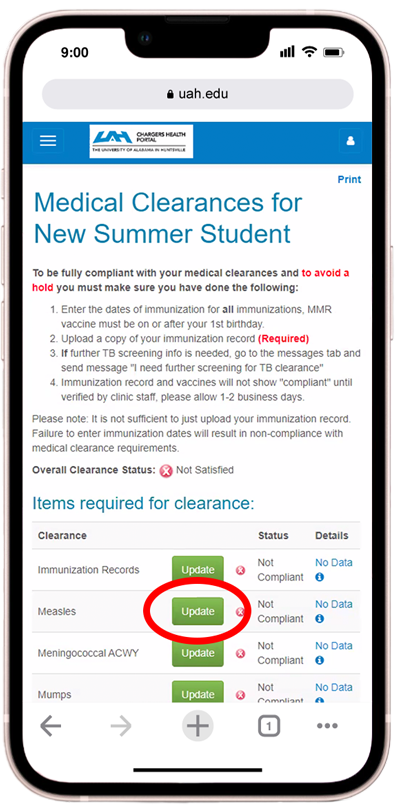
On the Medical Clearances for New Student page, select the immunization record you wish to update and click the green Update button.
Step 5
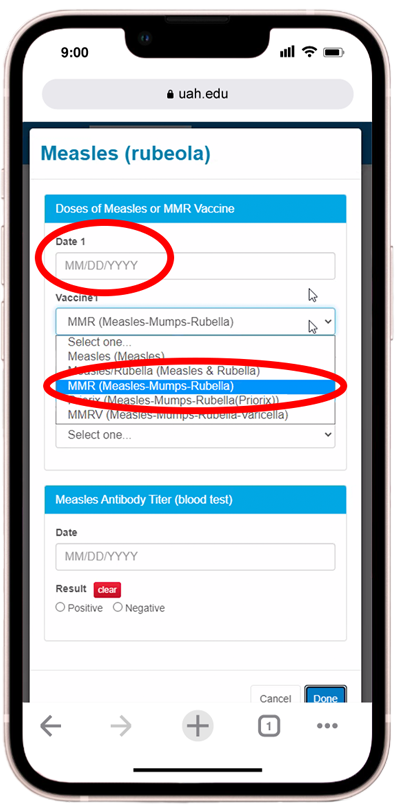
A pop-up window will appear. Depending on the requirements of the record, type the Date you received the vaccine and select the name of the vaccine from the dropdown Vaccine menu.
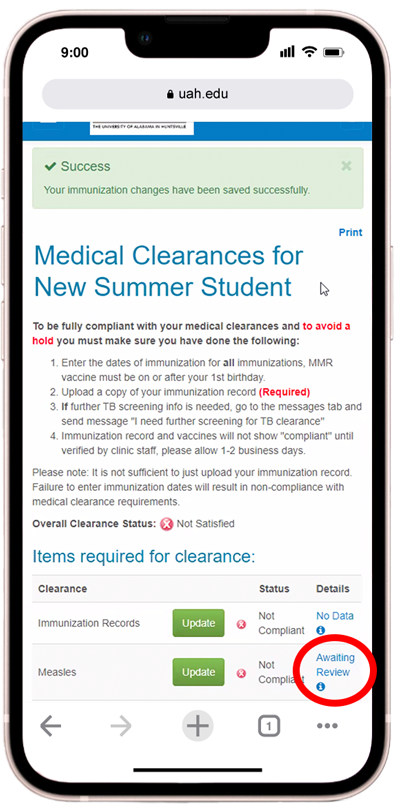
Step 6

You will return to the Medical Clearances menu. A green Success banner will appear at the top of the screen, indicating that you completed the step successfully. You should see a note saying Awaiting Review in the Details column of the clearance item you previously selected.
Step 7

Next, you must upload a proof of immunization document for that vaccine from your health care provider. To do this, click the green Update button next to the Immunization Records clearance item.
Step 8
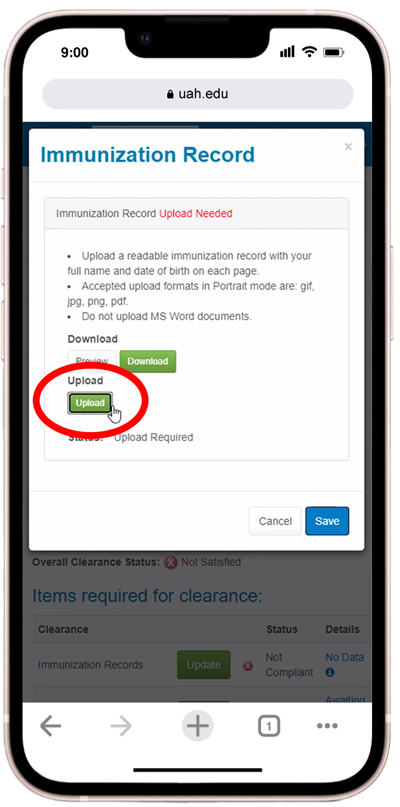
A pop-up window titled Immunization Record will appear. Click the green Upload button. When the file selection window appears, select the appropriate proof of immunization file that you received from your health care provider.
Step 9
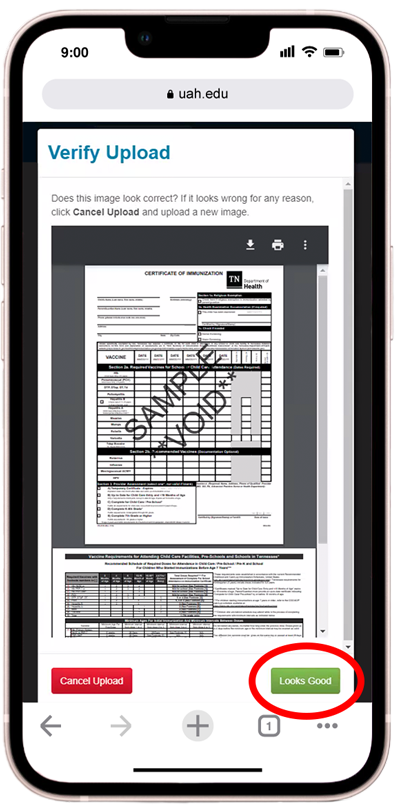
A second pop-up window titled Verify Upload will appear. Review the preview of the immunization form you just selected. If it is the correct form, click the green Looks Good button.
Step 10
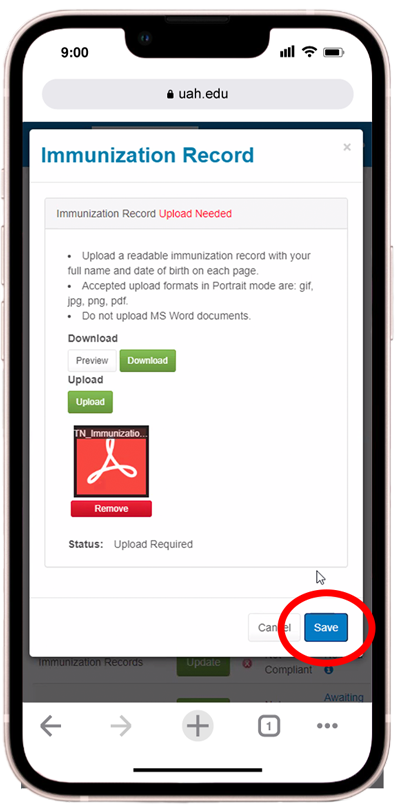
The Immunization Record pop-up window will reappear. Click the blue Save button.
Step 11
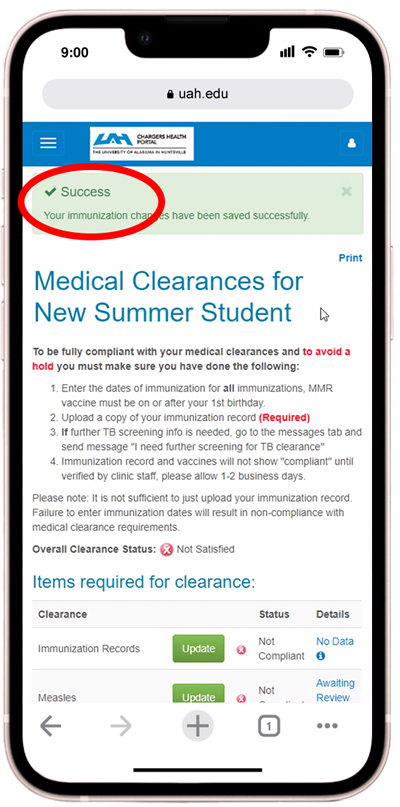
If the form was successfully submitted, you will be sent back to the Medical Clearances for New Student menu. A green Success! banner will appear at the top of the window.
Note: Repeat steps 4 through 11 for each required clearance item. Then, proceed to step 12 below.
Step 12
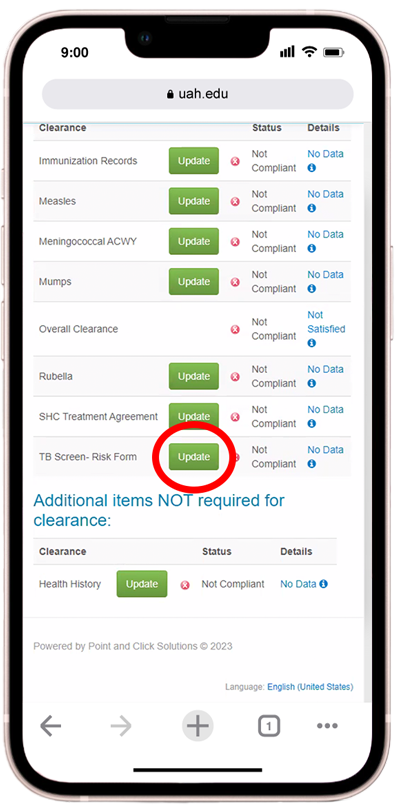
After uploading all your immunization forms, you must then complete a tuberculosis risk screening. On the Medical Clearances for New Student page, scroll down and click the green Update button for the TB Screen - Risk Form menu item.
Step 13
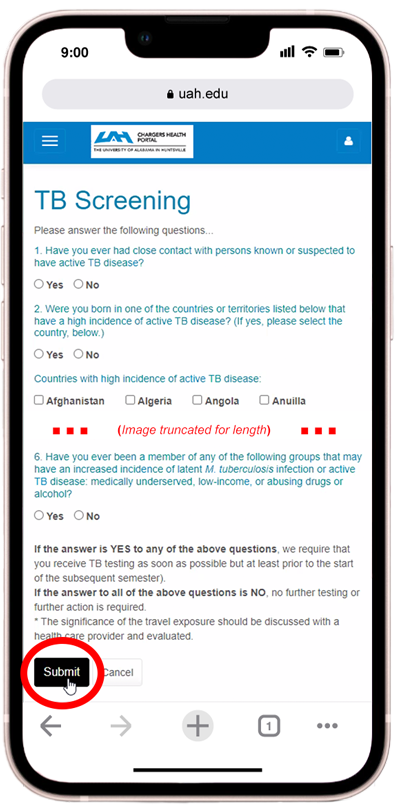
The TB Screening page will load. Please answer all six questions truthfully and click Submit when you are finished.
Step 14
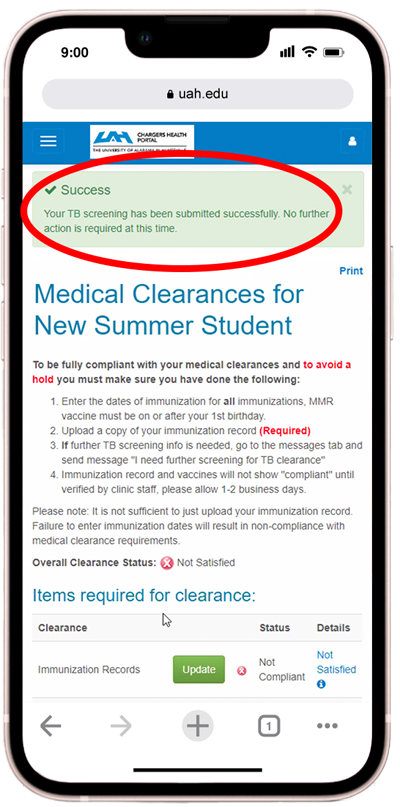
You will be sent back to the Medical Clearances for New Student menu. A green Success banner will appear at the top of the window, indicating that your form was successfully submitted.
Step 15
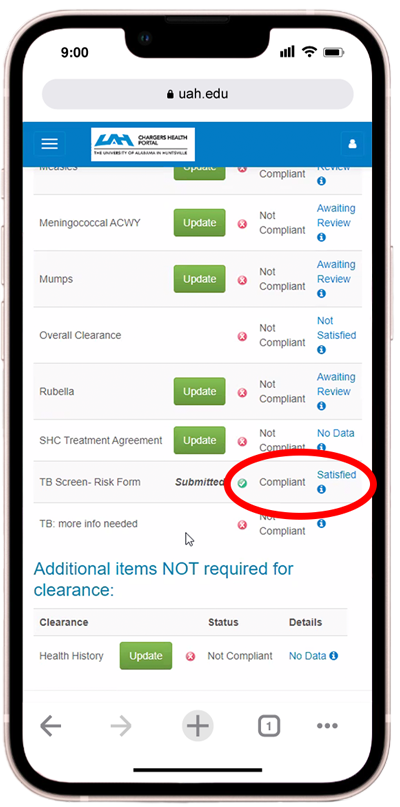
If your responses were satisfactory, you will see Compliant and Satisfied in the Status column of the TB Screen - Risk Form row. You do not need to do anything else unless notified by clinic staff. If you receive notification that further action is required, proceed to Step 8 of the Tuberculosis Screening process for mobile phones.
A Final Note:
When finished, each clearance menu item you complete will still say Not Compliant in the clearance item's Status column. Do not worry. You should see a note saying Awaiting Review next to the Not Compliant status column. As soon as a clinic staff member reviews and confirms your uploaded form, they will change your status to Compliant. You do not need to do anything else unless notified by clinic staff.